Updates

Follow new updates and improvements to Cardboard Connect.

August 6th, 2026

Admins can now attach custom emailed content to sales items. When attendees obtain an item with emailed content it is automatically sent to them and remains accessible at any time via their account, provided they still hold the item and the content remains enabled. This feature makes it easy to communicate item-specific details while adding protection against unauthorized link sharing.

New Email tab in Add-on Sales Items

When configuring an Add-on Sales Item, you will now see an Email tab. Links included in this email are automatically disguised as secure Cardboard Connect links, making this perfect for distribution of sensitive resources like hotel discount links.
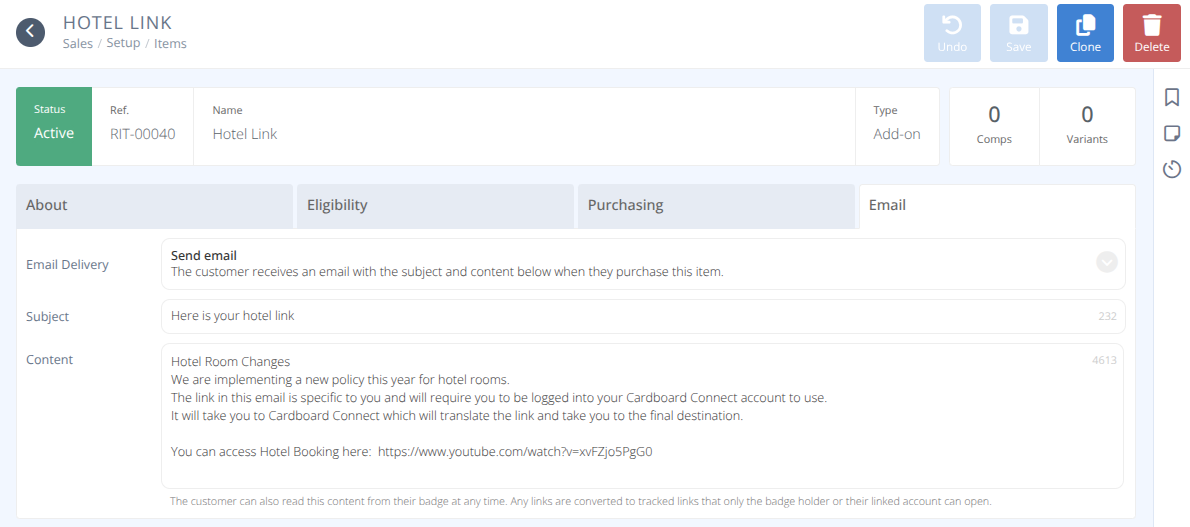
Screenshot showing the new Email tab inside the Add-on Sales Item configuration menu.

Example Email

Links within the email require attendees to be logged into Cardboard Connect to function. This will enable future link tracking and confirmation of usage while making it more difficult for public link sharing.
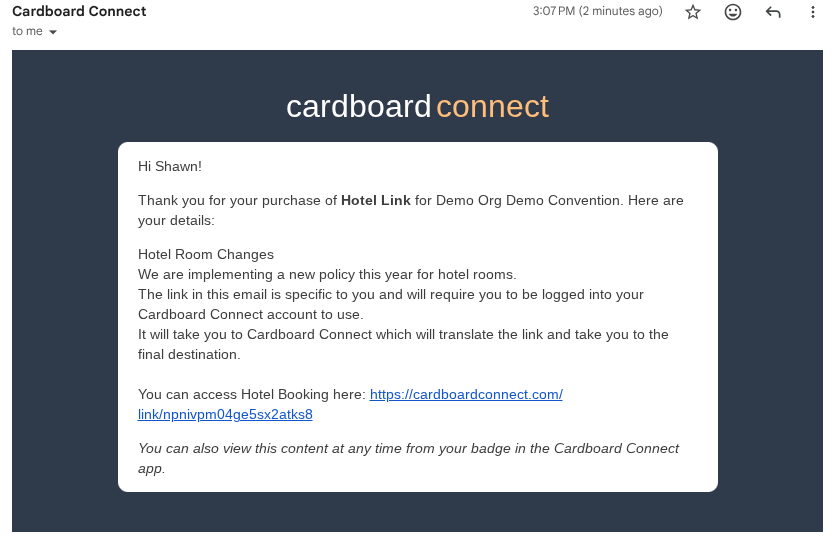
Preview of an email received by an attendee showing a disguised Cardboard Connect link.

Badge Holder Access

Badge holders can access the sent email at any time from the convention Store and My Add-ons menu.
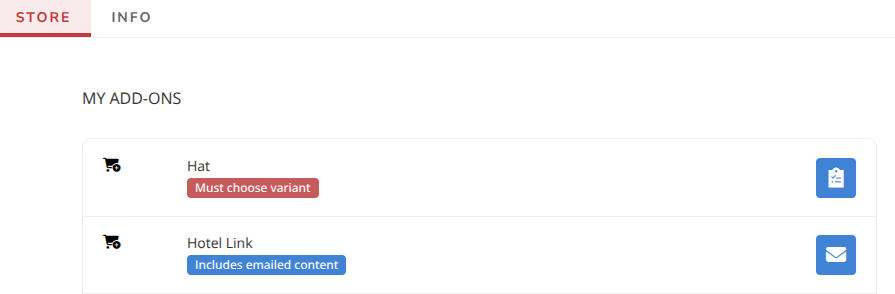
Screenshot of the Convention Store and My Add-ons menu showing how attendees access emailed content.

Note: Updating the email on a sales item will automatically update the content and links displayed in the attendee's My Add-ons view.
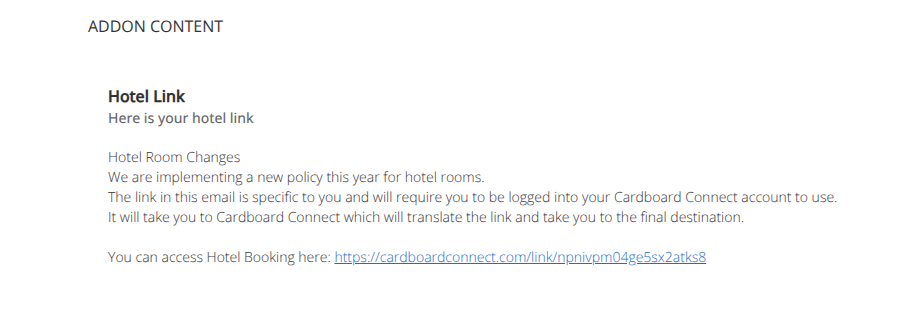
Sample of Add-on Content when viewed from the My Add-ons section.

Invalid and Revoked Links

If an item is transferred to another user or emailed content is disabled by an admin all existing links will be revoked. In addition if an unauthorized user attempts access, Cardboard Connect will display a "Link Not Available” notice.
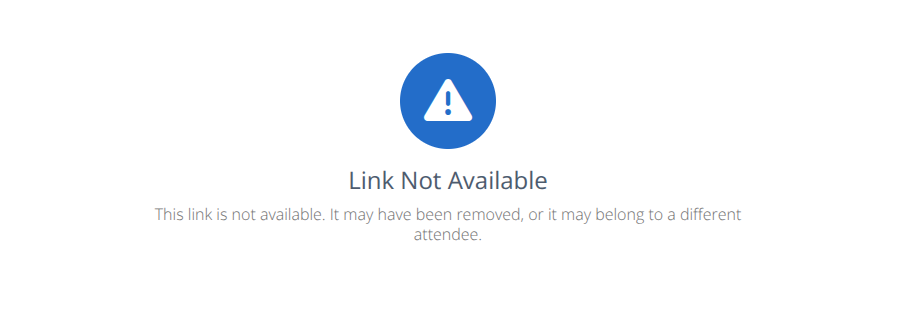
Example screenshot of the "Link Not Available" notification screen shown when access is revoked or transferred.
Write a comment...

June 19th, 2026

Exports and imports of records have been standardized across the system to provide a common interface. Exports have been added to most areas that contain records and the importing process improved where importing is supported.
Export Interface

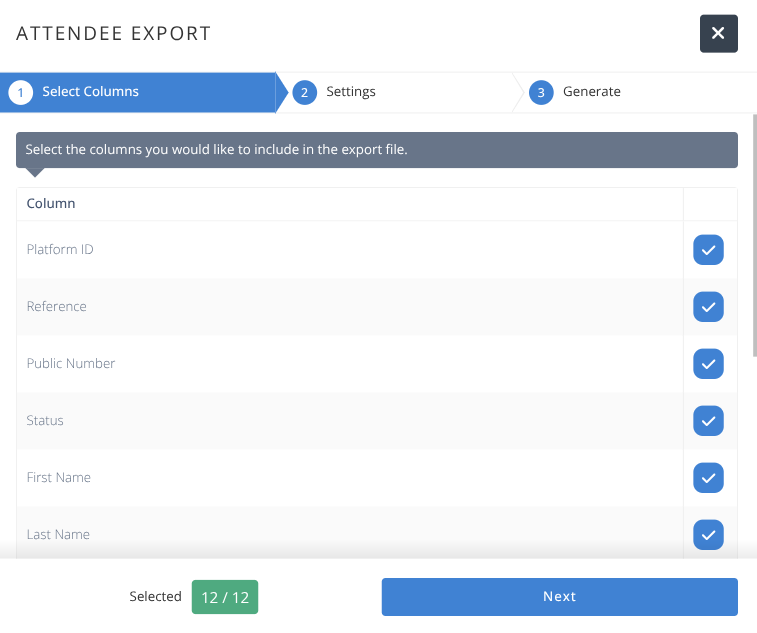
The export interface has been improved to follow a standard 3-step process:

  1. Select which Columns will be exported

  2. Select any export specific Settings.

  3. Generate & Download the csv file.
Import Interface

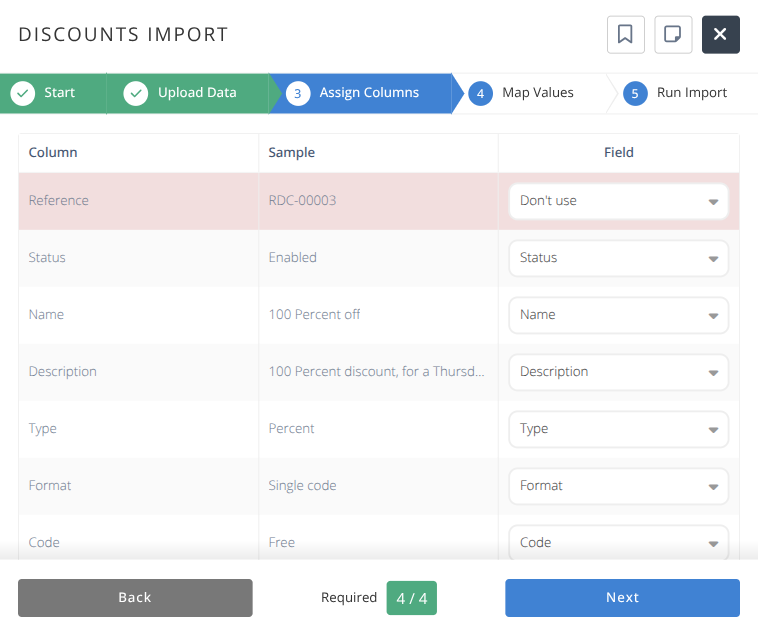
The import interface has been improved to follow a standard 5-step process:

  1. Start

    • The required and optional columns are displayed along with some general infomration on the fields.

    • A template CSV file may be downloaded to assist with creating a file for importing.

  2. Upload Data

    • Select the CSV file to upload noting that the first row must be column names and the file must be saved with UTF-8 encoding to ensure special characters are handled properly.

    • The number of rows, columns, and auto-matched fields are displayed.

    • Admins can specify how duplicate records are detected when required.

  3. Assign Columns

    • Review and select all matching fields between the import CSV and the section being imported into.

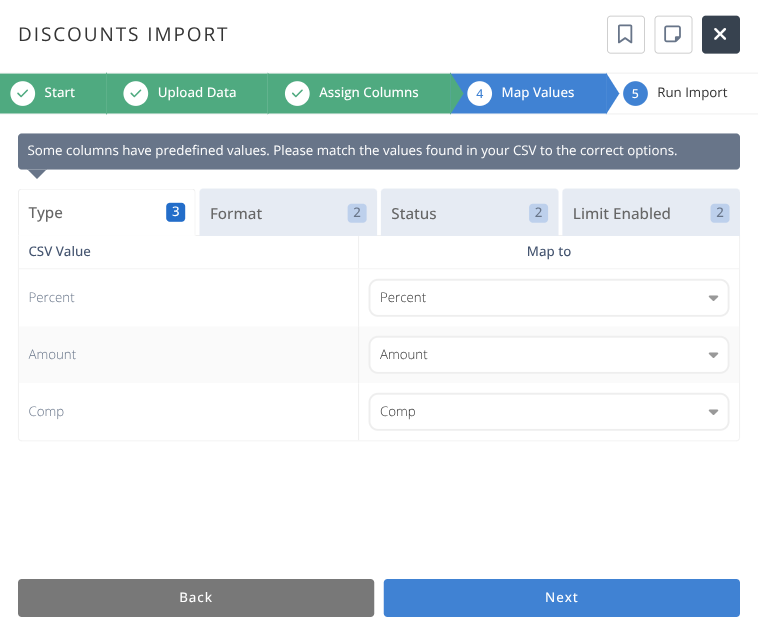
  4. Map Values (when required)

    • Review all fields that map to specific values and select the corresponding data value to map to.

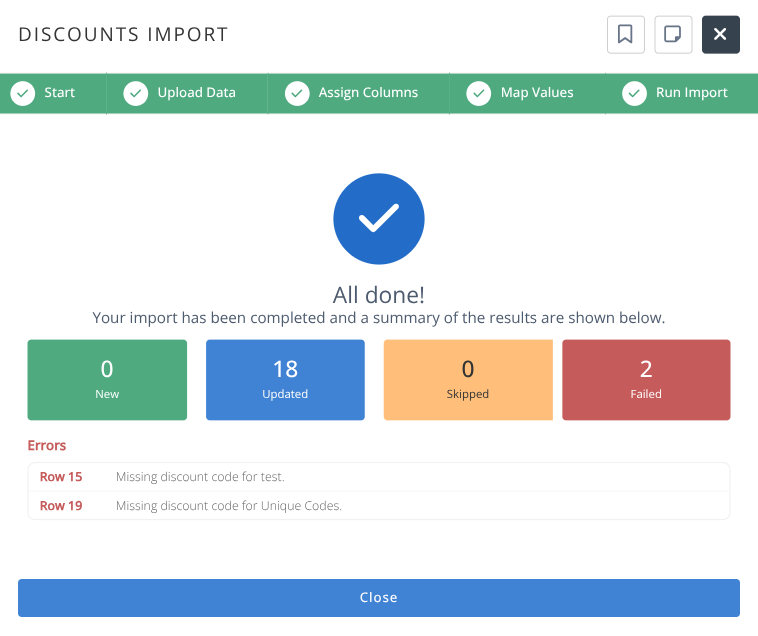
  5. Run Import

    • Complete the import. The number of new, updated, skipped, and failed updates will be displayed along with any errors encountered.

Write a comment...

June 19th, 2026

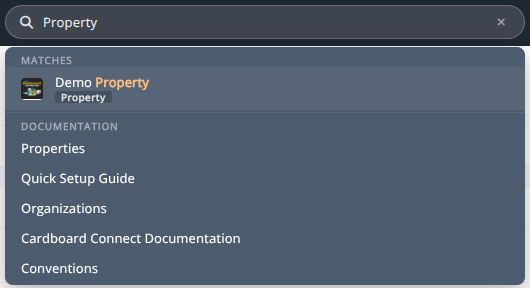
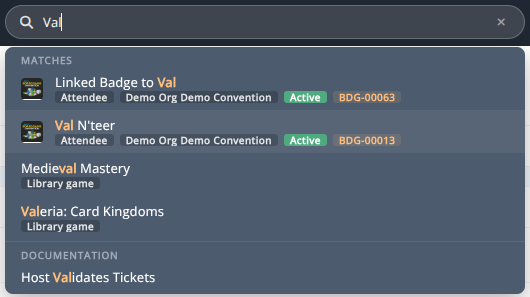
Administrators can now perform a Quick Search through screens, data, and documentation to find information and records quickly. The Global Quick Search is located in the center of the Mange Navigation bar.

Performing a Search

Typing in the Global Search will produce a list of possible matches that can be selected for quick navigation.

Headings and Tags can quickly help identify the correct result allowing for quick navigation to the selected item.

Write a comment...

June 18th, 2026

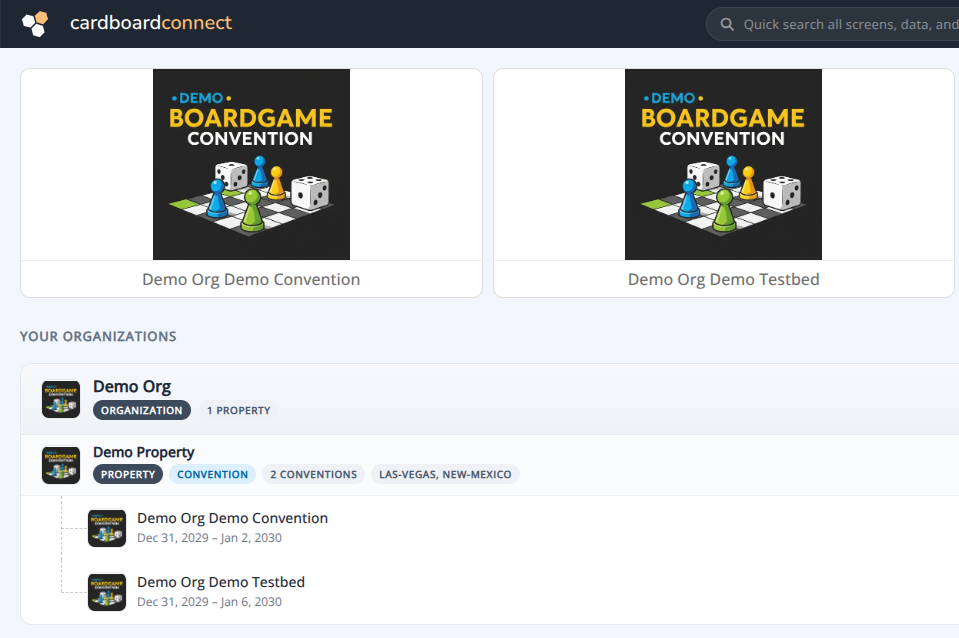
Admins will experience an enhanced Organization Interface, making it significantly easier to manage Convention and Store Properties and access current and past Conventions.

Manage Home

The Manage Home now features quick tiles for active and upcoming conventions. The updated layout cleanly separates each organization into Properties and Entities (Conventions or Stores), streamlining navigation so you can quickly find and select the right section.

Quick Navigator

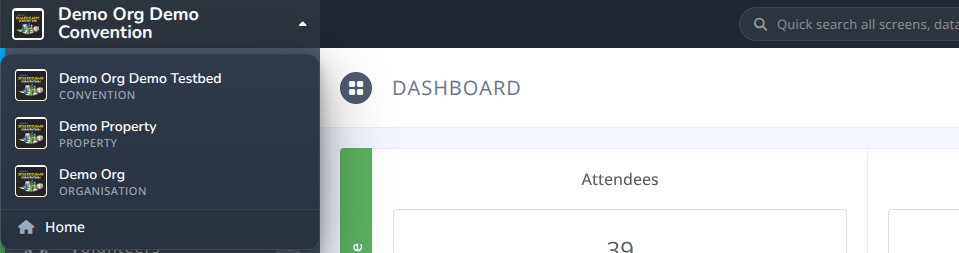
While viewing a property or convention, you can use the Quick Navigation Selector to seamlessly jump between different entities. Selecting Home will immediately return you to the quick tiles and the Manage Home.

Property Management

Property Management is now fully accessible from the Manage Interface, while still being supported in the Attendee Interface. This dual access allows active subscribers and full users of the Cardboard Connect platform to manage property-level Announcements, Pages, and Calendars from either location.

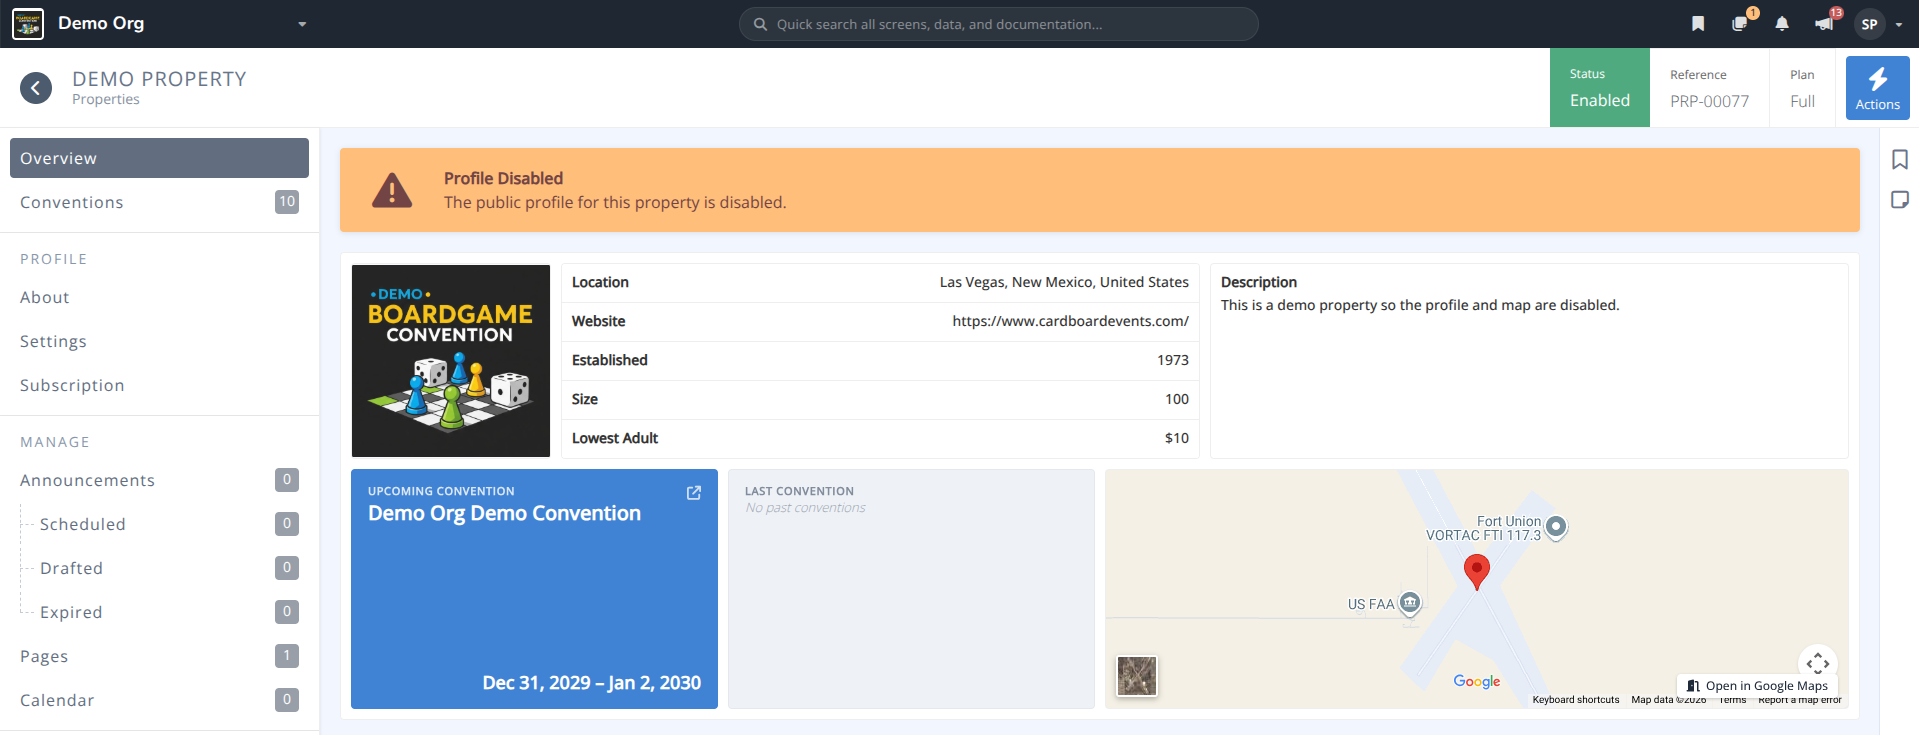
Property Profile

Admins can update Property details from the About menu including Name, Description, Logo, Location, Website, and any other relevant details.

Note: Some fields may not be edited unless the organization has an active subscription or has been granted full access to the platform.

Property Settings

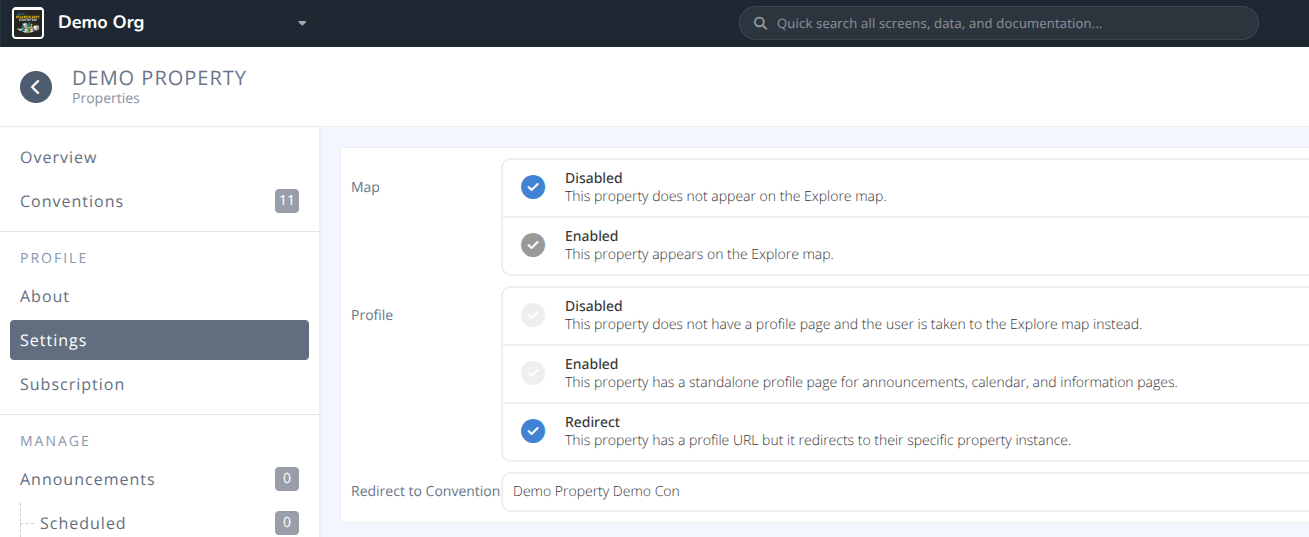
The Settings menu provides control over map visibility and for active subscribers and full users access to their Property Profiles.

  • Disabling the map will hide the property from the Explore Map so that it cannot be searched for or displayed in the Cardboard Connect directory

  • Enabling the Profile will display a standalone profile page for announcements, calendar, and information pages.

  • Setting the Profile to Redirect instead will send those visiting the property on the Explore map to go directly to the selected entity instead of the profile page.

Write a comment...

May 22nd, 2026

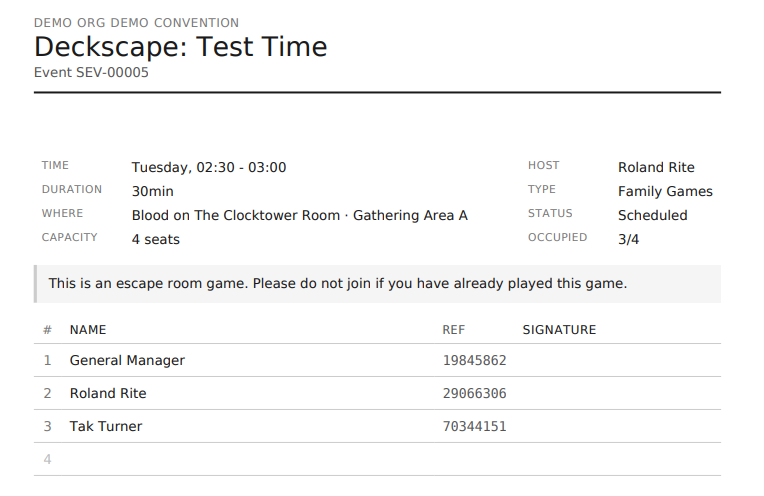
Admins and Event Hosts can now print Seat Reports. These reports provide a clear overview of event details, seat availability, and attendee lists, making them perfect for offline reference at the venue.

schedule-sample-seat-report.png

Administrative Reports

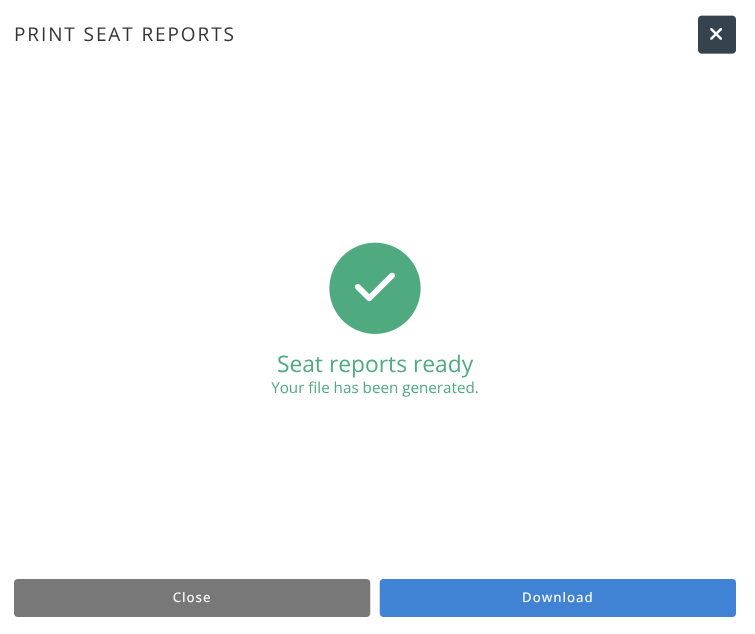
From the Manage Schedule Browse menu administrators can filter the schedule to download a PDF of all shown events. The quick search and other filters can be useful to narrow down which events to print. Individual reports may be printed from the individual detailed event view as well.

Host Reports

Event Hosts may download the seat report for their event from the detailed event view in the Attendee App.

Write a comment...

May 20th, 2026

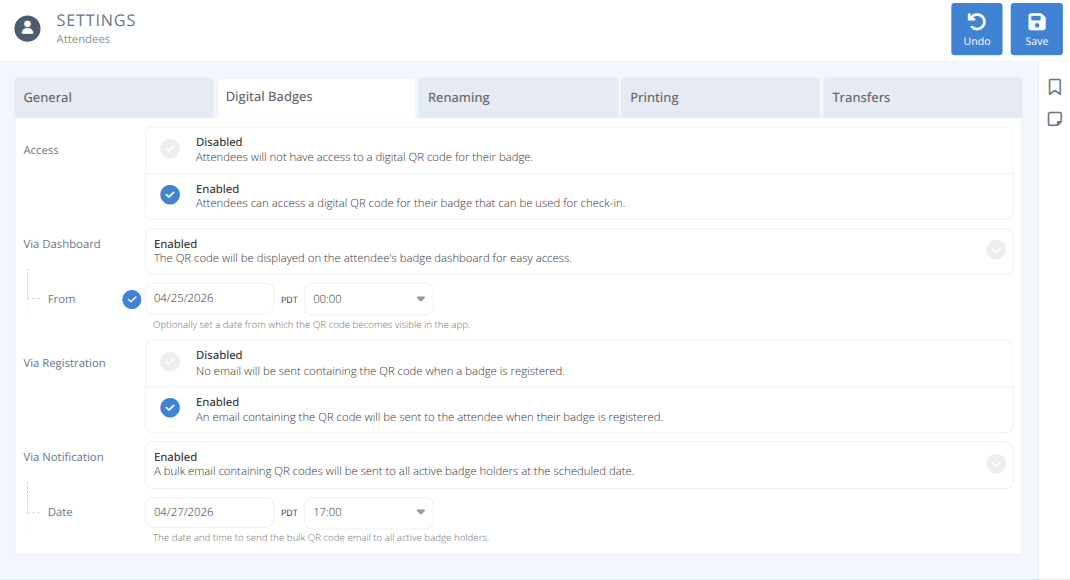
Admins can now enable Digital Badges to give attendees access to a personal QR code. This allows for a quick check-in process using the Check-in Assistant, provides a handy backup for misplaced physical badges, and even empowers conventions to go completely badgeless.

Settings

A new Digital Badges tab has been added to the Attendee Settings that lets you enable or disable digital QR codes for your convention.

Distribution Methods

Once access is enabled, you have full control over how and when attendees can view or receive their digital badges:

  • via Dashboard: You can choose to display the QR code directly on the attendee's badge dashboard for easy access. By setting a "From" date and time, you can control exactly when it becomes visible to attendees.

  • via Registration: Automatically send an email containing the QR code to attendees the moment their badge is registered.

  • via Bulk Email: Schedule a bulk email containing the QR codes to be sent out to all active badge holders at a designated date and time.

Attendee Experience

Depending on your chosen settings, attendees will receive an automated email containing their QR code (sent from no-reply@cardboardconnect.com) or they can simply log into their dashboard via the mobile or desktop app to pull up their digital badge for easy check-in scanning.

Write a comment...

December 16th, 2025

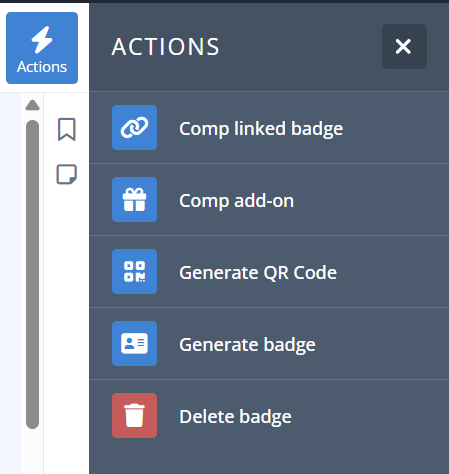
Admins can now comp linked badges to attendees via the detailed badge view. In addition, the interface has been upgraded to our improved actions area menu.

Detailed Badge View

The actions associated with a badge have been consolidated into an actions menu located in the top right of the screen. This brings all actions associated with the badge under a clean interface and is the standard layout that the system is moving towards.


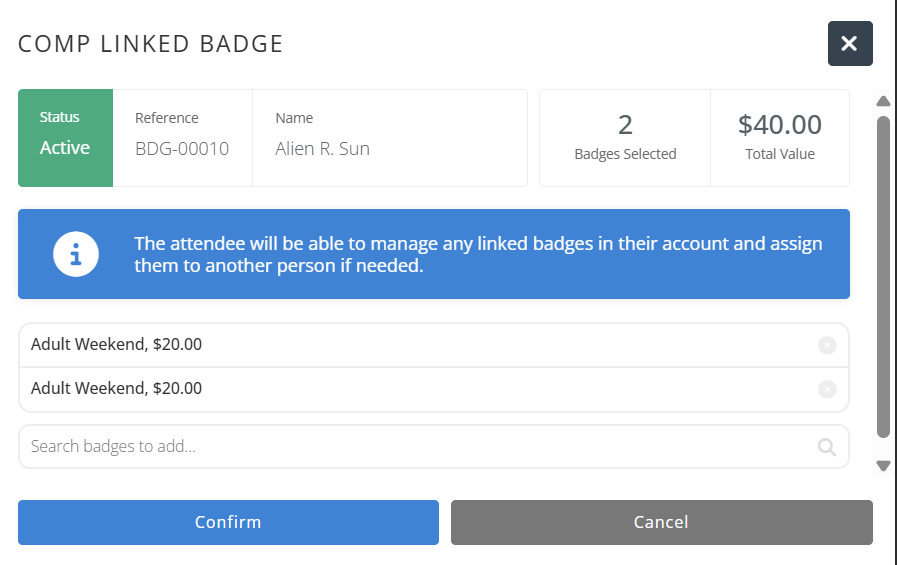
Comp Linked Badge

The comp linked badge functionality will open a panel where badges can be added. A summary at the top shows the total number of and value of the badges being comped.

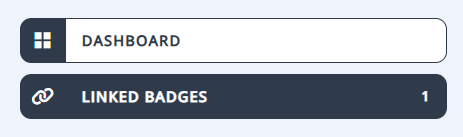
Badges will appear in the attendees “Linked Badges” section on the main dashboard and can be switched to by the managing badge holder using the main account menu. The managing badge holder can then name the badge for the person who will be using it or transfer it to their own email address/account.

Write a comment...

December 16th, 2025

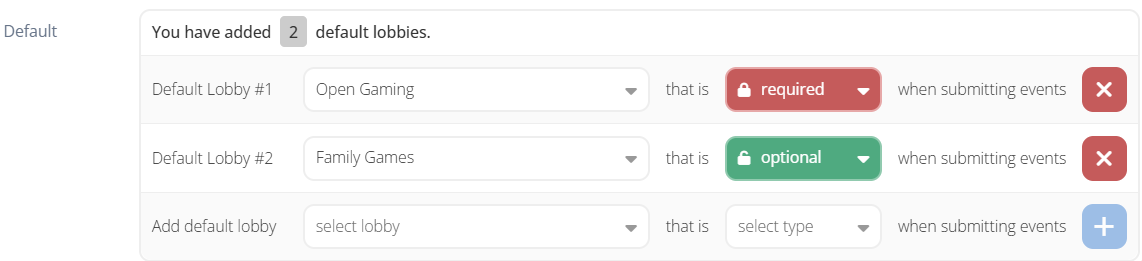
Admins can now optionally specify, at the room level, default lobbies to be selected when users are submitting events. They can make them mandatory or changeable, and even turn off user lobby selection entirely.

Rooms

A new Lobbies setting has been added for rooms that lets you enable lobby tagging (default) or disable it. This only impacts end users, admins can still tag lobbies in the backend.

Additionally, regardless of enabling or disabling for users, admins can now specify default lobbies for events submitted to that room. Each default lobby can be made required (the user cannot deselect it) or optional (the user can deselect it).

Users

For the end user, if lobbies are disabled then they won't see the input at all when submitting/managing events. If lobbies have defaults, these will be pre-selected on the form. If a lobby is required then it will have a lock icon and cannot be deselected.

Note: If there is a maximum limit of lobbies a user is able to tag to their event (e.g. 2 lobbies), then any default lobbies are counted towards that limit (e.g. 1 default lobby means only 1 additional lobby can be selected)

As always, admins are not restricted when editing events in the backend and can select whatever lobbies they want.

Write a comment...

November 14th, 2025

A range of new features and settings for volunteers have been introduced to give greater control to admins, including allowing non-attendees to see roles, enforcing minimum or maximum hours, and more.

Access

The Pre-approved menu has been renamed to Access to better reflect its usage. Badges can be granted access to specific roles through Allowlists and Blocklists.

Settings

Volunteer settings have been enhanced significantly.

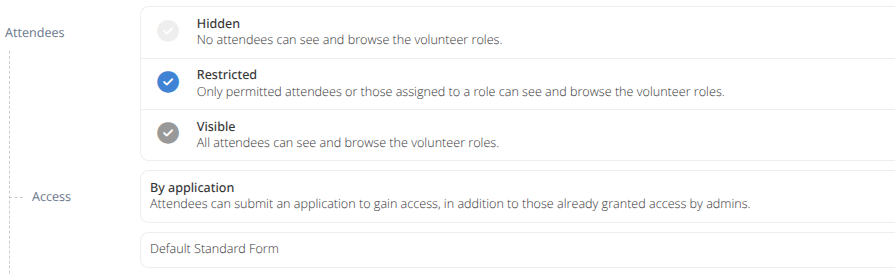
The Attendees section specifies how existing badge holders can view volunteer roles.

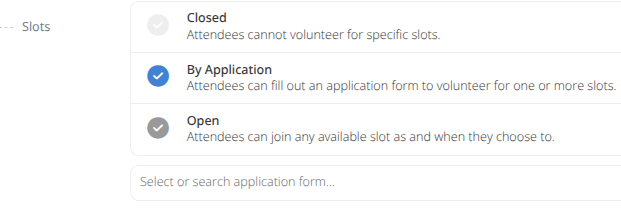
This can be further managed using the Slots settings.

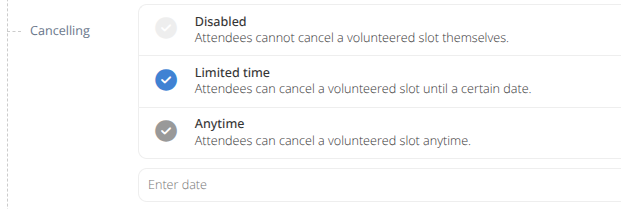
Slot cancellations can be open or restricted.

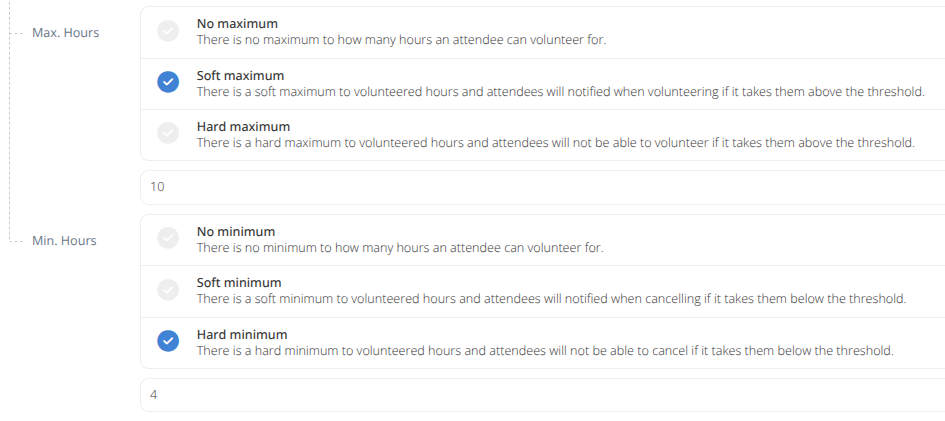
Minimum and Maximum hours may be enforced with soft and hard barriers that will warn or prevent volunteers from adding or removing shifts outside of the accepted range.

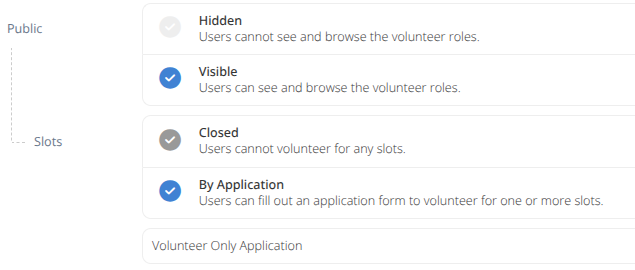
Public access from the attendee app can also be restricted and directed to the volunteer application process

Pending assignments can be set to reduce available capacity or not, allowing for full control of how volunteer slots are presented to prospective volunteers.

Attendee Experience

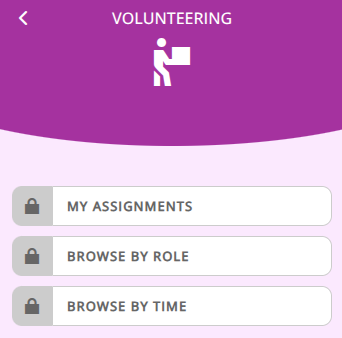
When the volunteer settings are “Restricted”, unauthorized attendees will see the volunteering menu items as locked.

An application to submit for access is shown when appropriate:

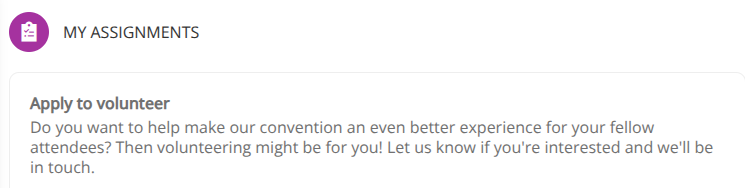
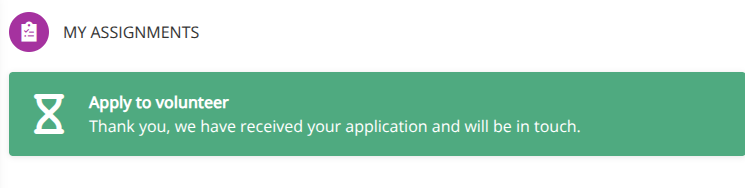
When slots are set to “By Application” the “Apply for roles” button will be displayed on the “My Assignments” page where the attendee can complete the application as would be done during registration.

Prospective attendees while viewing the volunteers area of the public information section of your convention will see the “Apply to volunteer” button which will redirect them to the chosen application form.

Write a comment...

November 14th, 2025

External users can now apply to become volunteers, selecting from the available roles and slots, for admin approval to gain access to restricted badges when registering.

Quick Guide

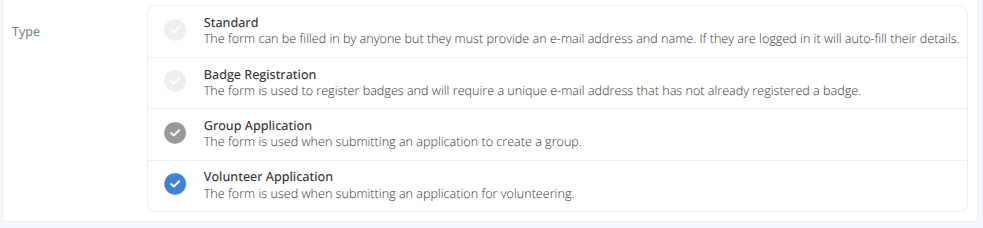
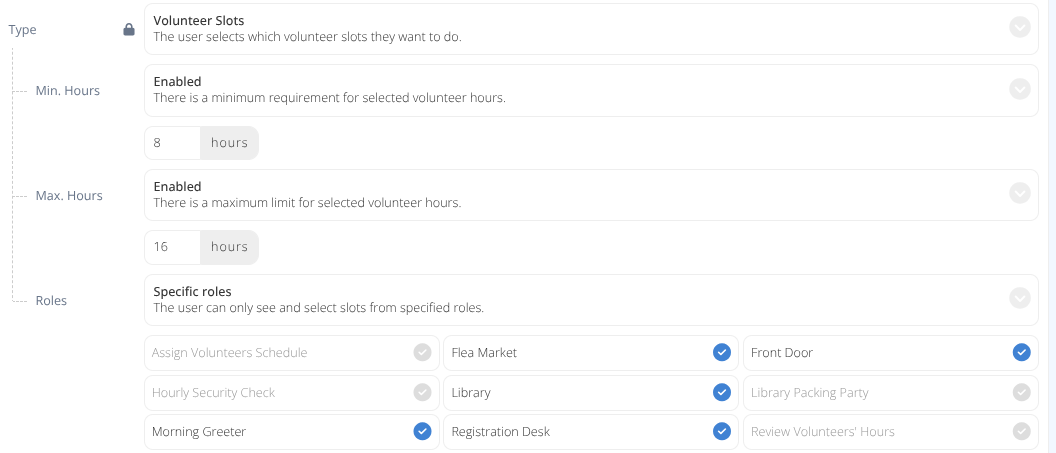
A new Form Type “Volunteer Application” has been introduced along with a new input type called “Volunteer Slots”.

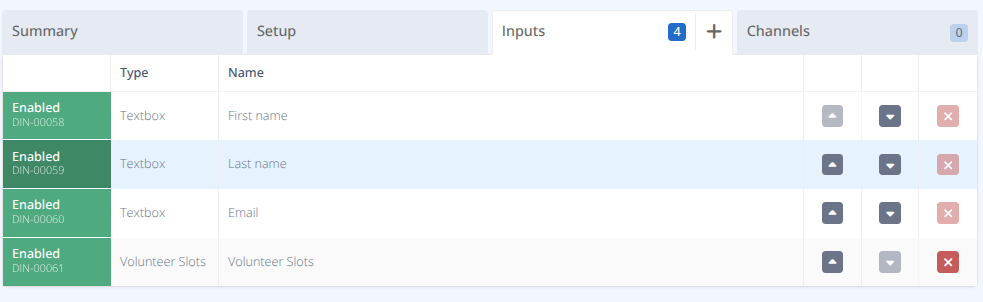
The base inputs for this form type includes First name, Last name, Email, and the new Volunteer Slots input

This input allows applicants to pre-select the roles and slots they would like to volunteer for before their application is approved and a link to obtaining a volunteer badge is provided

Additional settings for this input include Min. Hours, Max. Hours, and Roles (to limit the available choices).

Pages

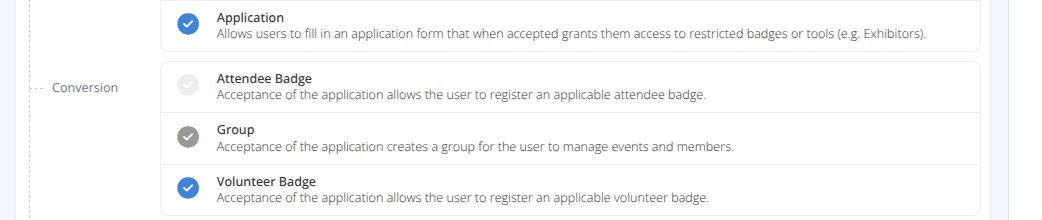
A new “Volunteer Badge” conversion has been added to Application Pages that will allow the use of the Volunteer Form.


When a prospective volunteer views the application page they will see a “Browse roles” button that will allow them to select volunteer slots and a counter that will show the number of hours selected

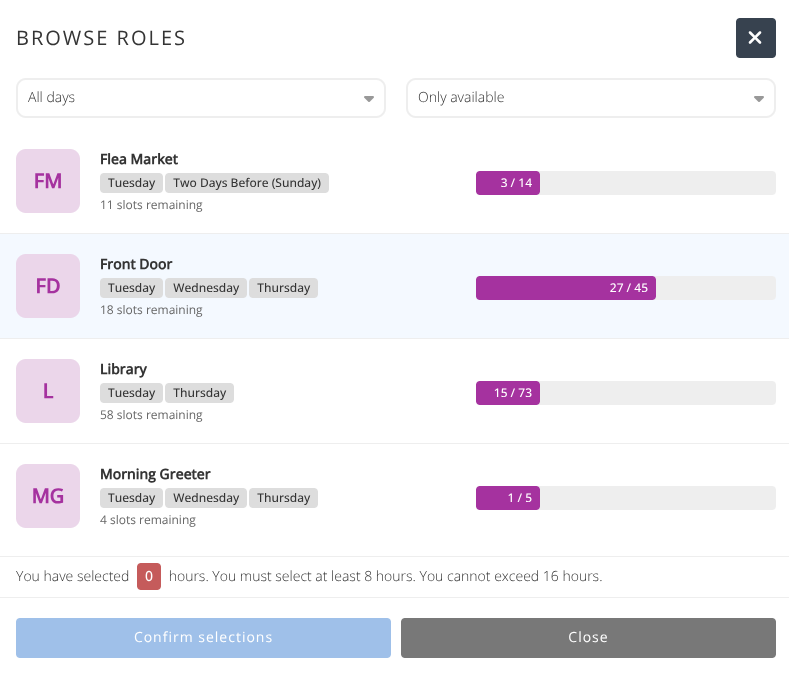
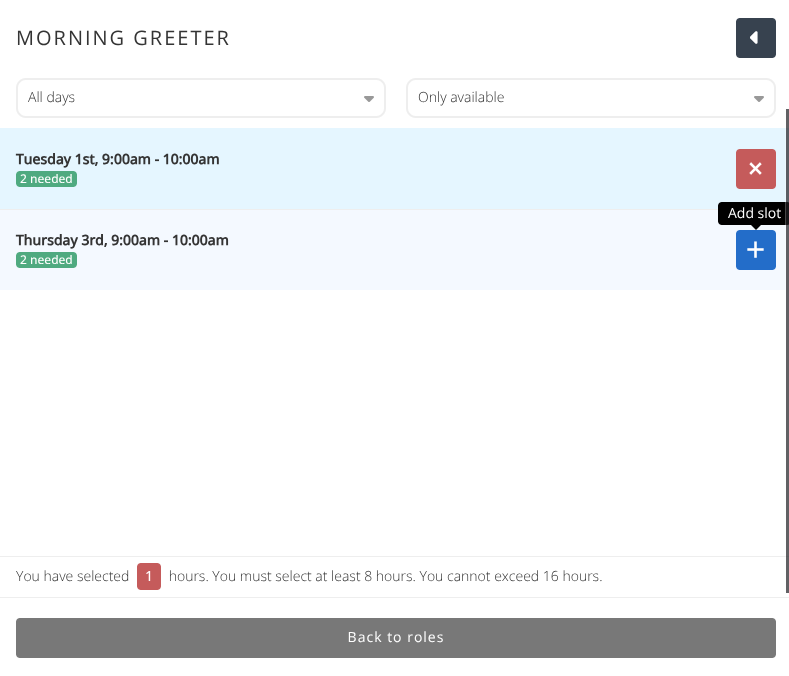
Clicking the Browse roles button will display a list of the available roles chosen in the form for the applicant to review and select. A counter at the bottom will show the number of hours selected, and any restrictions added to the form.

As slots are added and removed the selected hours counter will be updated.

Once the requirements have been met and the selections confirmed by the applicant, the application page will be updated with a summary of all shifts and the counter will be green allowing the submission of the application.

Applications

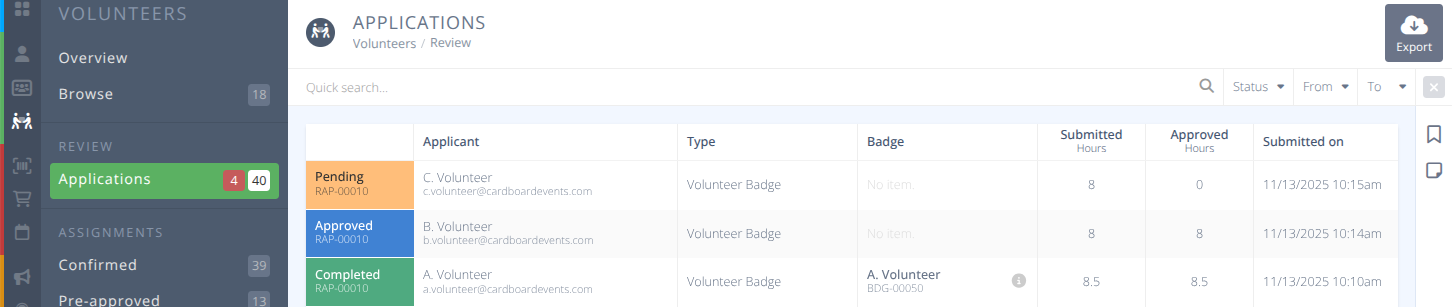
Admins can access applications via the new Volunteer > Applications page (previously Sign-ups), which displays a summary of the application.

Each application can be reviewed, notes added to the application, and the requested volunteer slots assessed.

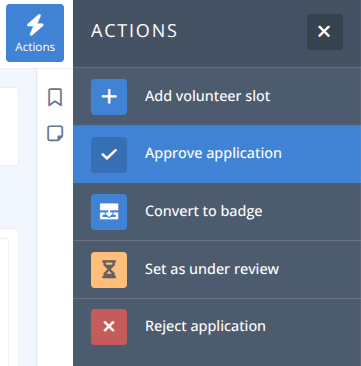
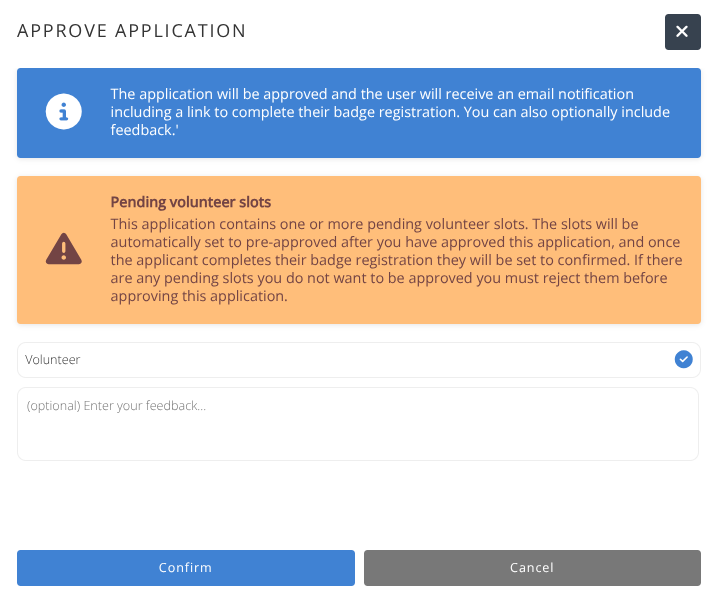
If an application is approved all pending slots will be set to pre-approved and once the applicant completes their badge registration will be set to confirmed.

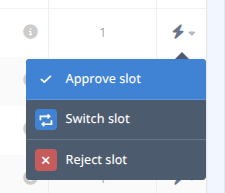
Volunteer slots can also be individually reviewed, approved, switched, or rejected directly on the application or in the appropriate Assignments menu

Write a comment...